DotNetNuke CSharp Web Application Project
THIS POST IS OBSOLETE AND LEFT HERE FOR ARCHIVAL REASONS
Better grab this before they take away my DNN license. But first, let me give you a bit of background.
Background
Past versions of DotNetNuke typically came with a source code release and an installation release. Many developers (myself included) look at DNN as a platform and prefer not to touch the DNN source code. Once you start tweaking the source code, you open up a world of headaches if you plan on upgrading to the next version of DNN since you add the pain of making sure to migrate your own changes. DNN provides plenty of integration and extensibility points that for the most part, touching the source code is unnecessary.
Instead, I set up my projects to only reference the DNN assemblies and
include the *.aspx, *.ascx, etc… files without the code behind. If
you’ve worked with DNN before, you may be familiar with the My
Modules
technique
which included the famous _DNNStub project.
But now comes ASP.NET 2.0 which introduces a new web project model. To put it mildly, there was a bit of a negative reaction in some circles of the community around this new project model, which to be fair, serves its purpose but is not for everybody.
Naturally, when DNN 4.* was released, it was built upon this new model.
Unfortunately for module developers used to the existing manner of
development, the recommended method for developing modules now involves
adding code directly into the special App_Code directory of the DNN
web project. Shaun Walker, the creator and maintainer of DNN, wrote up a
helpful guide to module development for DNN
4.*
using the new Starter Kits.
Web Application Projects Introduced
But now that Microsoft released the new ASP.NET 2.0 Web Application Projects model, I thought there had to be a better way to develop modules that took advantage of the Web Application projects and was more in line with the old manner of doing it. I figured it couldn’t be that hard.
Also, I wanted to take advantage of the WebDev.WebServer (aka Cassini) that comes with VS.NET 2005. Shaun had mentioned that they had problems with running DNN using it, but I had to see for myself. The benefits of a completely self-contained build as well as being able to run the local development site on a webroot (for example http://localhost:8080/) on WinXP was well worth an attempt.
Web Application Projects Unleashed
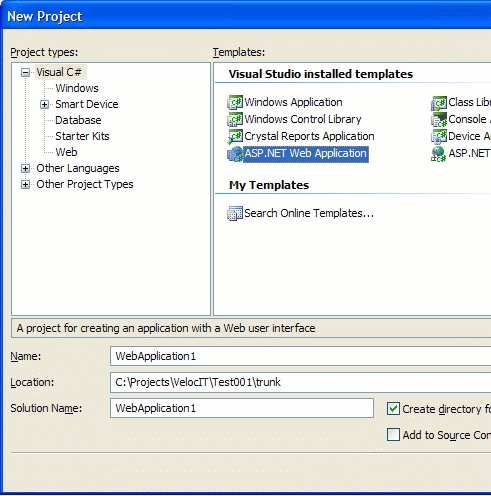
So after installing the Web Application Project templates and add-in, I created a new web application project in VS.NET. To give myself a bit of a challenge (and since I may decide to add a custom page for some reason later), I chose to create a C# project as shown in the screenshot.

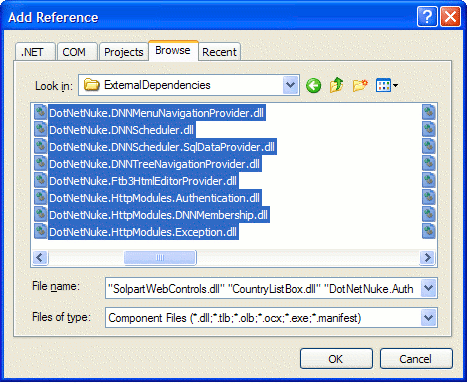
As per my usual process, I created a folder named ExternalDependencies in the project and copied all the DNN assemblies from the Installation distribution (DotNetNuke_4.0.3_Install.zip) into that folder (this is just the way I roll). To add those assemblies as assembly references, I right-clicked the project, selected Add Reference, and then selected all the assemblies in that folder.

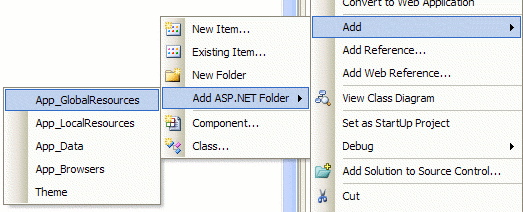
The next step was to add the special App_GlobalResources folder to the
project by simply right clicking on the project and selecting Add |
Add ASP.NET Folder | App_GlobalResources.

After copying the contents of App_GlobalResources from the installation distribution into that folder, I copied all the other non-code files, *.ascx, *.aspx etc… into the project. At this point I am almost done getting the basic project tree setup. The one last issue to deal with is the code behind for Global.asax. Even with an installation distribution of DNN 4, this is included because under the Web Site project model, it gets compiled at runtime (unless pre-deploying). Personally I think this code could be put in an HttpModule. In any case, I translated the file into C#. This was actually a bit trickier than I expected because of the use of Global variables.
After completing these steps, I renamed release.config to web.config, updated the connection string, and hit CTRL+F5. The WebDev.Webserver started up pointing to the web application project using the URL http://localhost:2334/ (your results may vary) and it all worked!
One major benefit to using WebDev.WebServer is that getting this site running on a new development machine takes one less step. No need to futz around with IIS. Not only that, since I do my development on Windows XP which only allows one website, I used to have to develop DNN sites in a virtual application. This caused a problem when deploying the site because static image and css file references had to be updated.
With this approach, my URLs on my dev server match the URLs in the production site. One caveat to be aware of is that this approach only works if you are not using any special features of IIS. I recommend testing on a staging server that is running IIS before deploying to a production server with IIS. I only use Cassini for development purposes, not to actually host a site.
Module Development
I went ahead and added some pre-existing modules to the project (upgrading them to .NET 2.0) as separate projects. I was able to add project references from my Web Application Project to the individual module projects. As far as I can tell, there is no longer the need to have a BuildSupport project with this approach.
Comments
14 responses