
Quickstart Guide to Subversion on SourceForge
Good news! SourceForge now supports using Subversion for source control!
One complaint I received from developers who read my Quickstart Guide To Open Source Development With CVS and SourceForge is the sheer amount of complexity just to get started (not that it was my fault, I was just the messenger). With Subversion, contributing to a project on SourceForge is now much simpler.
Benefits of Subversion over CVS
Subversion has several key benefits over CVS, a few of which are listed here…
- Subversion supports WEBDAV+DeltaV which works over HTTPS so that whole process of generating an SSH key is no longer necessary.
- Checkins are atomic (“all or nothing”). This helps keep a check-in error from causing a broken build.
- Subversion versions file and directory renames and moves.
- Branching and tagging are fast as they are implemented as a copy operation within the repository.
Drawbacks to Subversion
The one key drawback to Subversion has to do with the last benefit listed. This was an architectural decision by the Subversion team to simplify and speed up branching and tagging. For branching, this is not such a bad idea. A branch is simply another folder within the repository. By convention, this tends to be a folder within a top-level “branches” folder.
For tags though, this is not as ideal because Subversion does not restrict editing tags. In fact, tagging as it is done in CVS does not exist in Subversion. Tagging is merely a convention developers follow by branching (a repository copy operation) to a subfolder of the top-level “tags” folder. To enforce a tag, one would have to implement a hook script to disable edits.
Software
Before we continue with this guide, please download the following tools.
- TortoiseSVN
- a Windows SVN client
- Official SVN Client (OPTIONAL: for those who prefer a command line client, though this guide will focus on using TortoiseSVN).
Checking Out a Repository
At this point, you are all set to get going. One key difference between CVS and Subversion is that Subversion does not have the concept of a “module” like CVS. In Subversion, all your code is organized into folders within a repository.
- Make sure you’ve been added as a developer to the project you’re going to work on. A project administrator would have to do this.
- In Windows Explorer go to the folder you wish to check the code out into.
- Right click and select the SVN Checkout command:
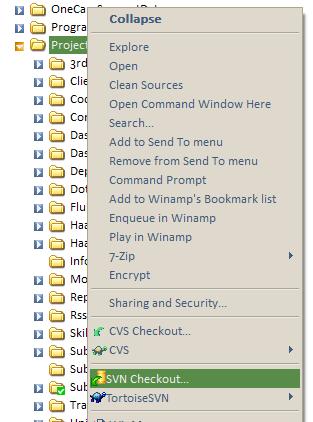
-
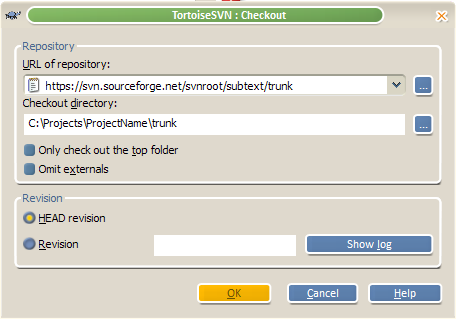
This will bring up the following checkout dialog. You will need to know the url of the project’s repository. This should simply be https://{project unix name}.svn.sourceforge.net/svnroot/{project unix name}. The URL to the project’s trunk is typically located at https://{project unix name}.svn.sourceforge.net/svnroot/{project unix name}/trunk. Note that the url is “https” and not “http”.
For example, the URL to the Subtext repository is https://subtext.svn.sourceforge.net/svnroot/subtext. However, it is not a good idea to check out the top level repository folder (believe me). That will download every file in every tag and branch. Instead, you should enter the URL to the trunk. For Subtext, you would enter https://subtext.svn.sourceforge.net/svnroot/subtext/trunk
- TortoiseSVN will prompt you for your SourceForge username and password. You can optionally check a box to have it save your credentials so that you do not need to enter them every time.
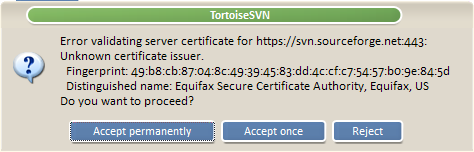
- At this point, I received an invalid certificate dialog. Hopefully
this will be fixed soon as it is not generally a good habit to
accept an invalid certificate.
- Wait patiently as files are retrieved from the repository and copied to your local machine.
Now Write Some Code
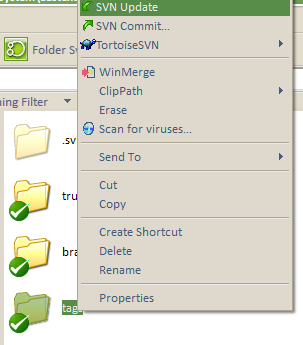
Note that you only have to checkout the repository once. Afterwards you can run the update command to get changes committed by other developers. It’s a good idea to do this before and after you make any changes.
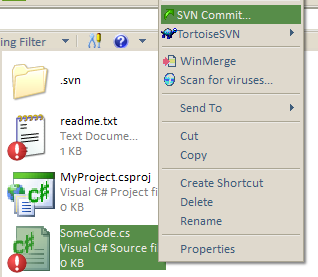
Commiting Changes {.clear}
After you’ve changed some files, their icons be marked with an orange arrow. To commit your changes, right click and select the Commit command. Please make sure to enter an informative comment.
To commit multiple changes, right click on the root folder and select Commit. You’llget a list of all changed files. You can check the ones you wish to commit and commit them in bulk.
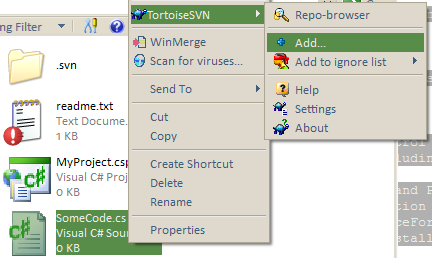
Adding Files
If you add a new file to the project, you’ll need to add it to Subversion and then commit it. To add a file, simply right click on it and select “TortoiseSVN | Add”.
Know when to ignore {.clear}
TortoiseSVN is not integrated with Visual Studio.NET. Thus it doesn’t know that there are some files you do not want to add to Subversion such as *.suo, *.pdb and maybe the bin and obj folders. There are a couple ways to tell Subversion to ignore certain files.
The way Subversion handles ignored files is different from CVS. In CVS ignore settings are repository wide. For Subversion, the ignore list is a folder by folder setting. Thus ignoring a file within a folder does not necessarily apply that setting to its subfolders.
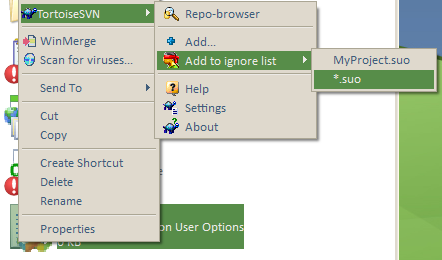
The quick way to add a specific file or file extension to the ignore list for a folder is to right click on the file and select TortoiseSVN | Add To Ignore List.
Since this ignore list only applies to the specific folder (and not to subdirectories), another approach is to setting an ignore list for the project is to right click the root folder and select the normal Windows Properties dialog. You will notice a Subversion tab in the dialog.
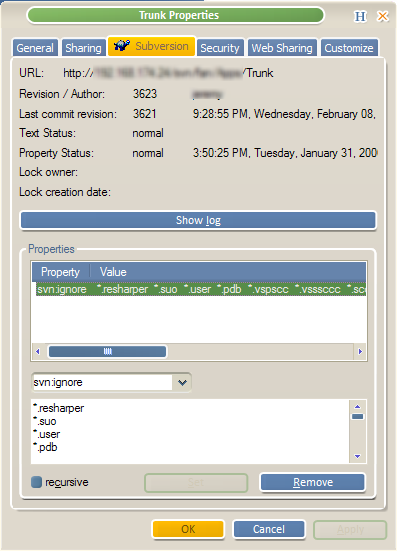
This dialog allows you to specify various Subversion properties (meta-data) including one called svn:ignore. Select the svn:ignore property (or if it is not in the drop down, just type it in there). Underneath the drop down, you can type in wildcards for the file extensions to ignore. If you wish to set each sub-folder with the same svn:ignore values, then check the recursive checkbox before clicking Apply or OK.
Submitting Patches as a Non-Developer {.clear}
If you do not have developer access, you can still submit patches to a project. In most SourceForge project sites, there is a “Patch” section where patches can be submitted. In order to learn how to submit and apply patches, read the following article Using a Windows version of GNU Patch.exe with CVS and Diff Files.
For More Information
- Be sure to read Eric Sink’s Source Control HOWTO.
- SourceForge.net: Subversion (Version Control for Source Code) SourceForge’s own docs on using Subversion from within SourceForge.
- Version Control with Subversion, an online (though slightly outdated) book on Subversion.
Conclusion
Again, I hope this gets you on your feet when joining an open source project on SourceForge. By supporting Subversion, SourceForge has removed some of the complexity in getting involved. Subtext will be migrating to Subversion at some point in time. When we do so, I will be sure to update this document with any lessons learned.
Comments
89 responses